Creating a Technician on PFIM Web interface
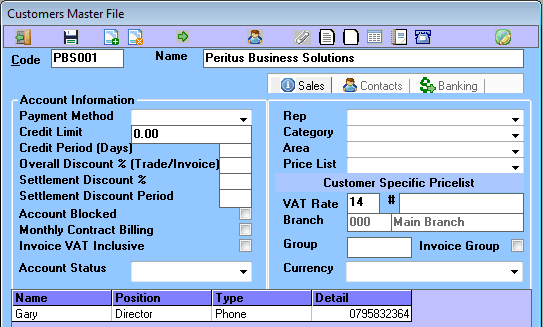
Creating a technician requires that you have first created your internal organisation as a customer or supplier, and associated technician as a contact.
This is done via Customer – Master File (This process is documented separately.)

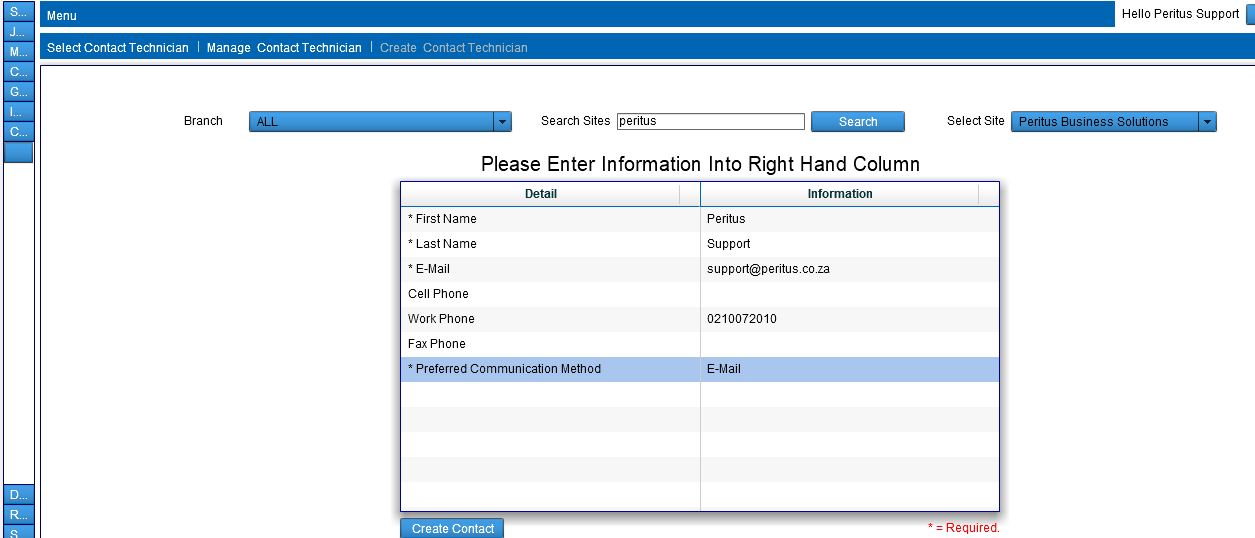
Inside the Web Interface select Menu – Contacts – Contact Technician
Now from the top bar select Create Contact Technician
Type part of your organisation name into “Search Sites” and select search now select the correct organisation in the “Selected Site” List.
Capture all required details indicated with an asterisk.
Select Create Contact
The Contact will open select the Technician tab and change the UserName and Password fields. Remember these for the user creation later.
You need to create a contact for each technician within your organisation.
Note: When using multiple branches you need to create an internal organisation per branch and only create the relevant contacts per branch. From the Contact screen note the ContactID in the bottom right corner, this is needed in creation of the Technician record.
Back in the full client
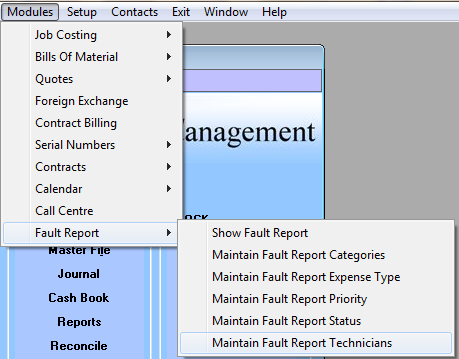
When clicking on the Modules – Fault Report – Maintain Fault Report Technicians menu option.
You are confronted with a list of Technicians, at the top of the form there are insert and remove record buttons where you can add your new row for your technicians. Note the Technicians name should be unique as it is this list that is displayed in the Technician fields on other forms.
The ContactID should be the one you noted when looking at the Contact Details form earlier.

Note: you need to save the changes by clicking on the black disk.
When a contact has to alter data in the program it also needs a PFIM user account with an exact replica of the Username and password as used in the Contact creation.

